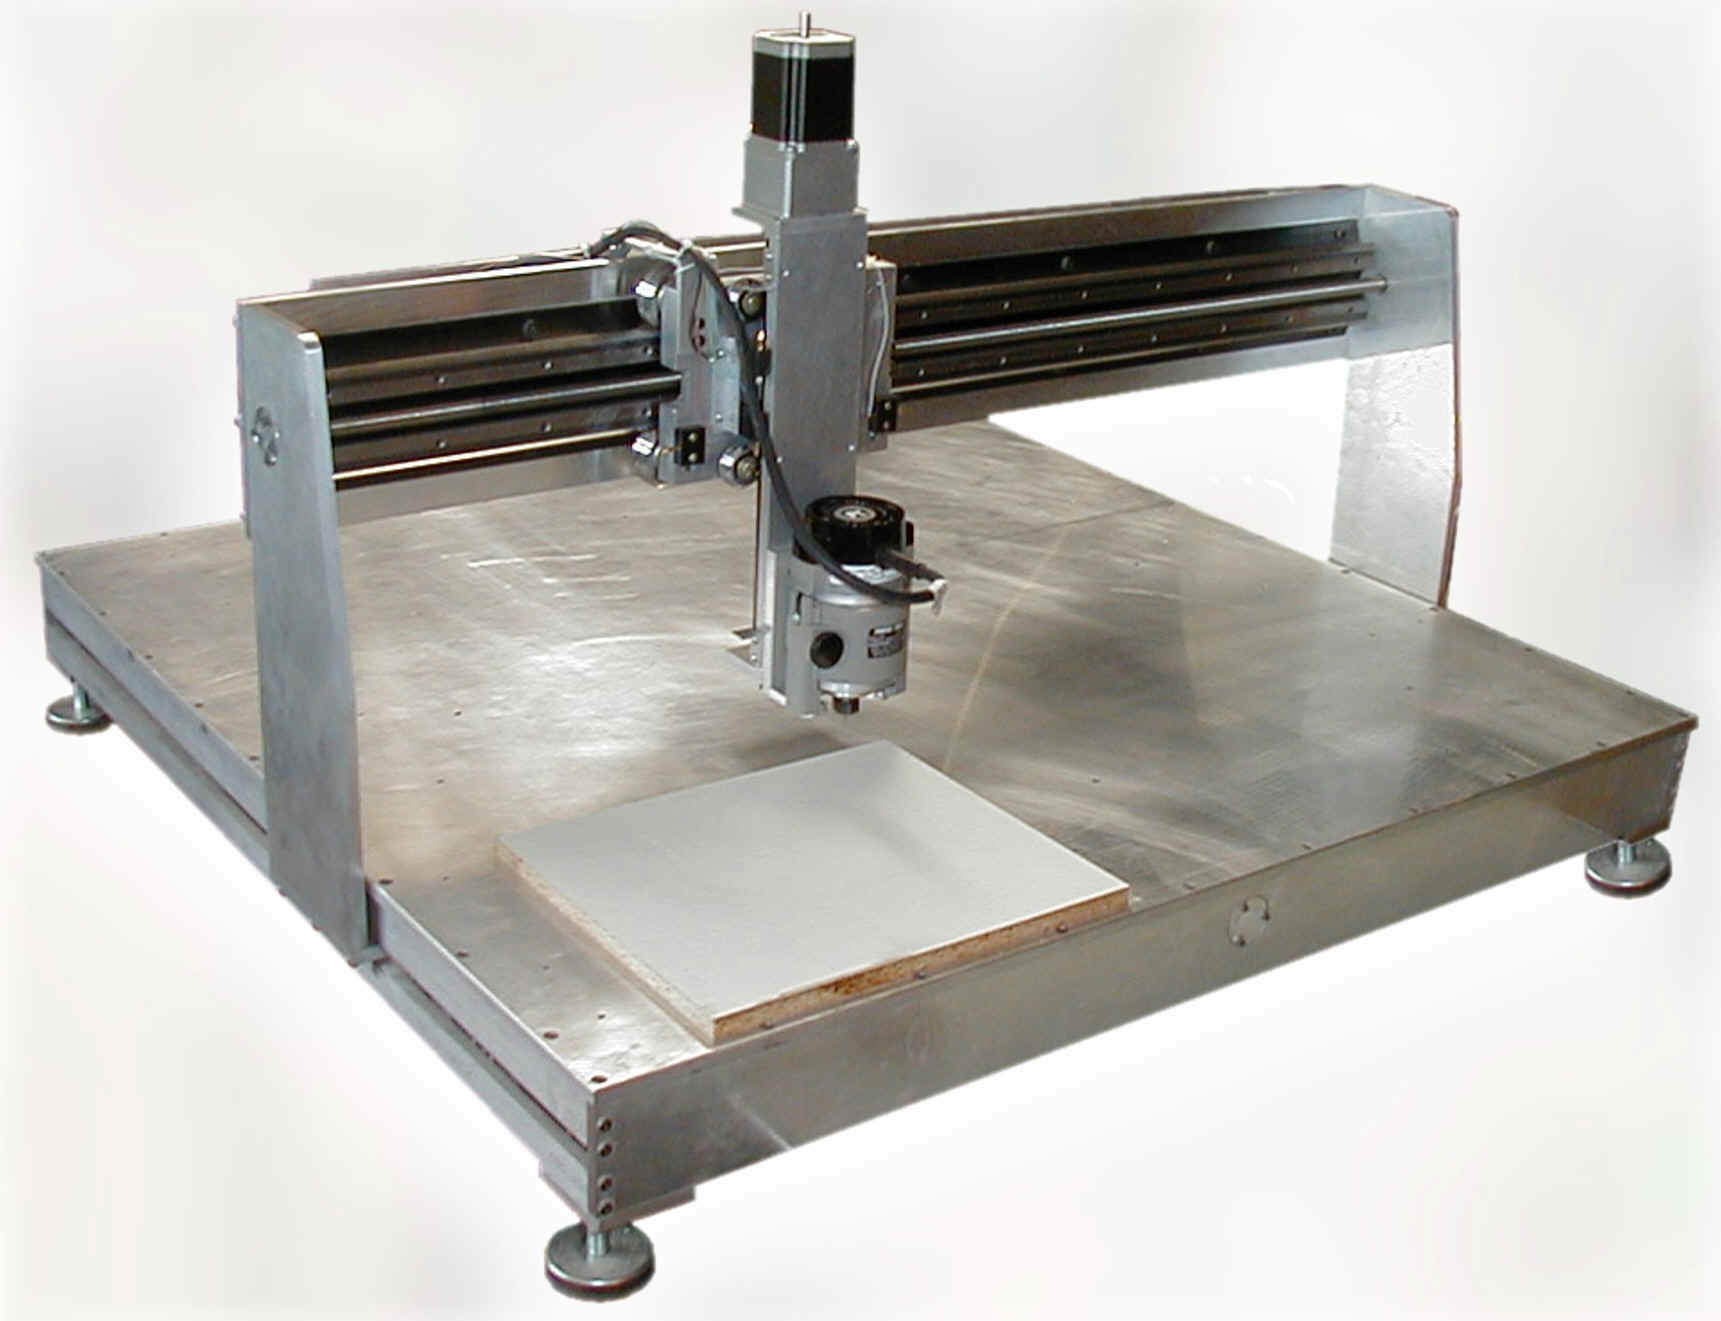
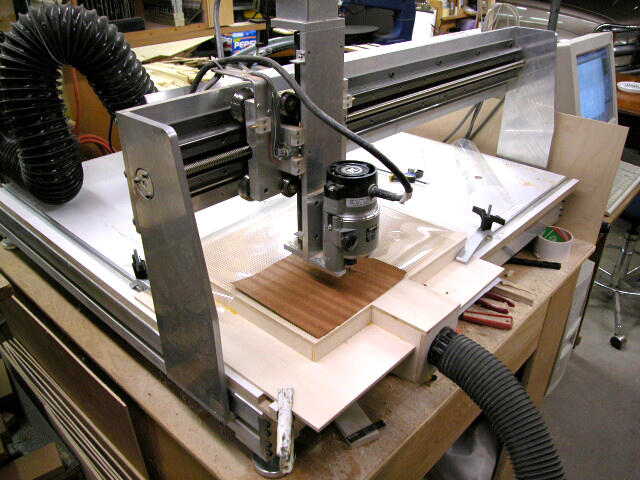
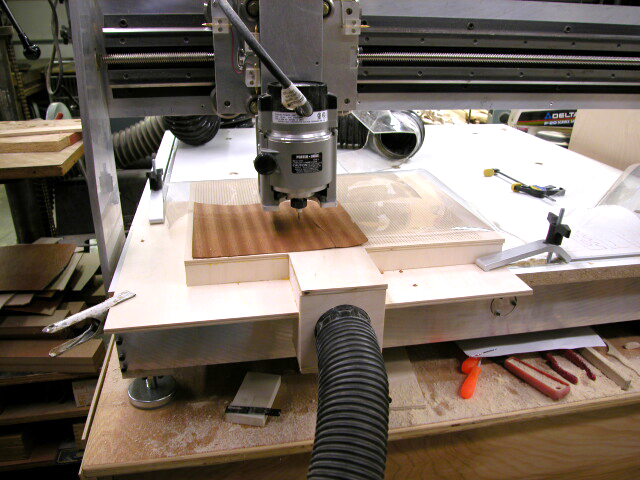
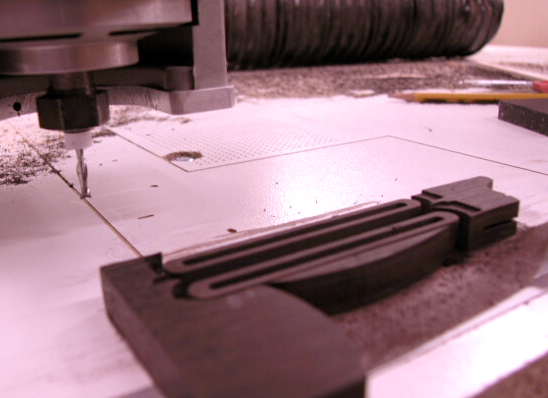
CNC Router The new toy !!!
This is the newer ventures I have started into. This is a router coming out of Kansas City, Mo., I would call this one the prototype, it is the first one built. But the man has kind of dropped the project again. Maybe in the future we will see it come back and be available.
So far I have had a lot of fun with it making many names in ovals, and other test cuts. Trying to learn as I go since there are so many things the router will do. You will need the knowledge of a vector based drawing program to draw up your designs. I use Corel Draw 9 for this, as it can export the needed DXF files to the router program. You can use any program to draw, like CAD programs, that will generate a DXF file.
I have placed most of my old time designs for sale. They will be written as DXF files or Corel Draw 9 CDR files. Go to the patterns for sale pages of the web page to see what is available.
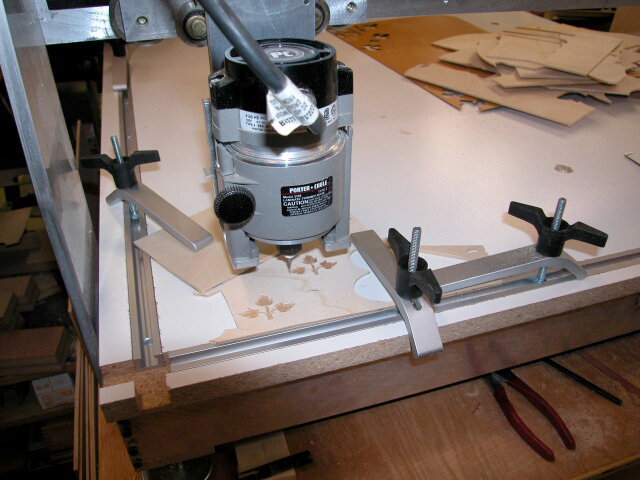
Close Up of the router cutting !
Short movie showing the designer of the router. Rick West , the one with the blonde hair, is the designer
Short movie of the router in action. Shorter clip for dial-up modems
Short clip of a small sliding lid finger joint box.
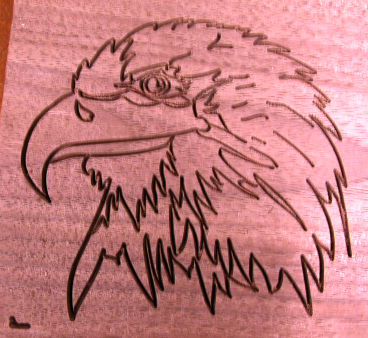
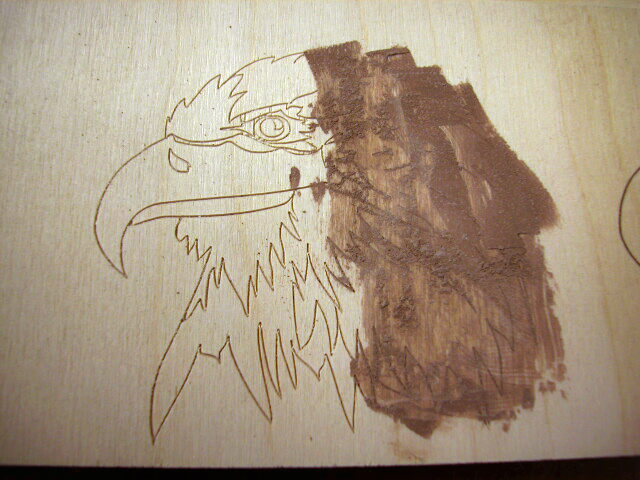
The first real projects done on the new CNC Router
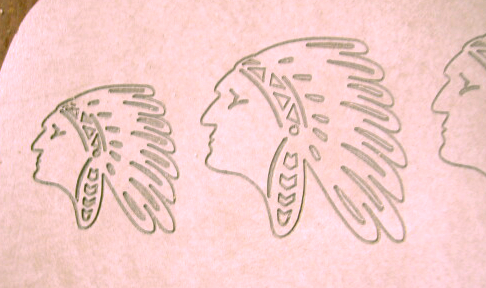
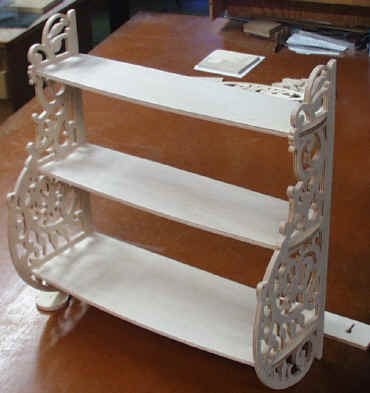 This is
cut from 1/4" BB Plywood and it took about 45 minutes to cut. The feed rate
was set at 50 Inches Per Minute on the router. I used a 1/16" 2
fluted bit.
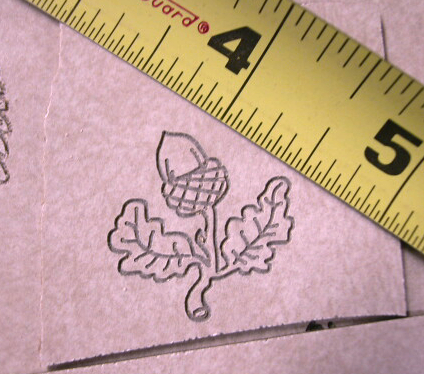
This is
cut from 1/4" BB Plywood and it took about 45 minutes to cut. The feed rate
was set at 50 Inches Per Minute on the router. I used a 1/16" 2
fluted bit.
![]() This was an early attempt at inlaying 1/8" blue plexiglass into a
section of 1/4" BB Plywood.
This was an early attempt at inlaying 1/8" blue plexiglass into a
section of 1/4" BB Plywood.
 I
used some of the T track to make hold downs for the plywood that I cut a lot of.
Seems to work fine for me in most cases.
I
used some of the T track to make hold downs for the plywood that I cut a lot of.
Seems to work fine for me in most cases.
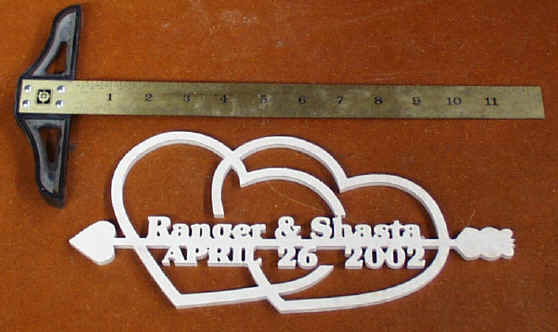
 This
is a name tag I made.
This
is a name tag I made.
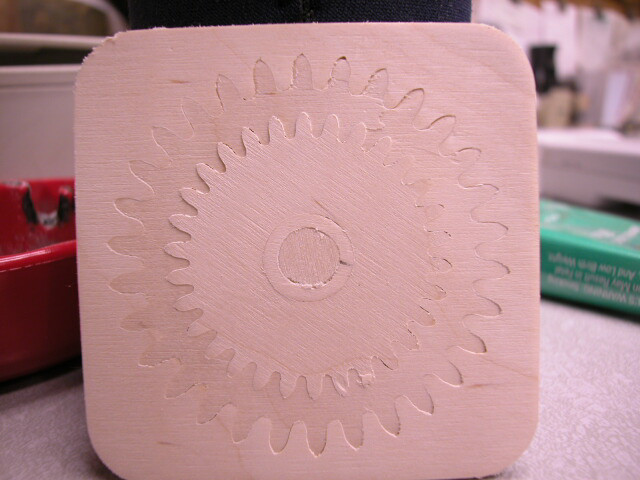
This gear set was cut on the CNC Router Measures 3" X 3"
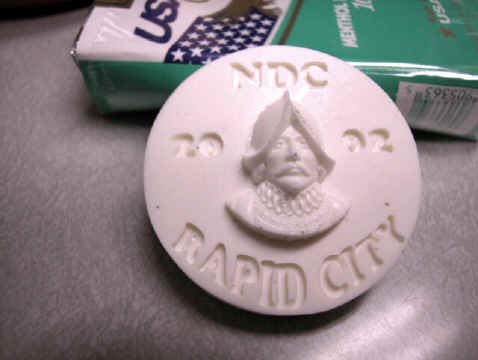
I used the CNC to cut the letters into 1/8" plexiglass. The Face is an emblem
from a 53 Desoto car. The lettered disc and face were put together and a rubber mold was poured, then this pin was poured with plastic into the rubber mold.
![]()
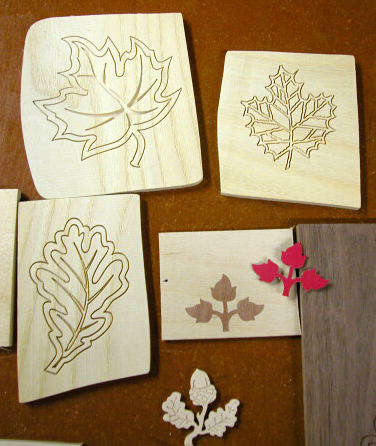
Below are some of the inlays I have made. The first picture is Formica into plywood. The second and some of the others are wood veneer into plywood. And the 3 big leaves in the third picture are just cuts, like an engraving.

![]()

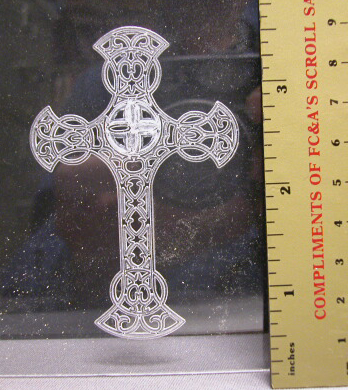
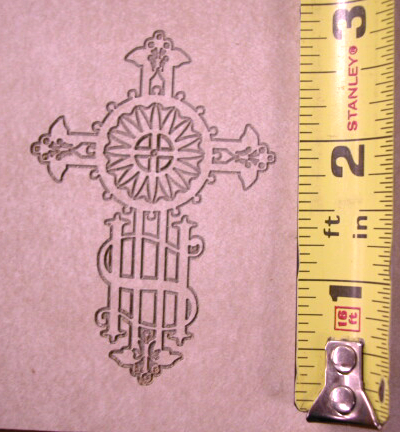
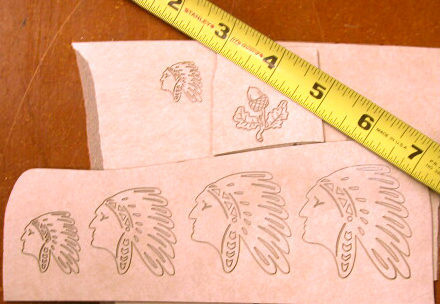
These are all cut with the 30 degree engraving bit. The first one in plexiglass is cut from the back. The center the bit plugged with plastic and melted part of the pattern out. This was cut from the wrong type of plexiglass, but still worked after I figured out the trick to doing it. The rest are cut into Formica laminate. Note how small the CNC will cut these patterns. The original patterns for the crosses are draw for a 10" tall pattern.

I designed and built a vacuum table for cutting veneer. When I tape the veneer to the table, the final inlay would usually get broken trying to get it off the tape. Now just shut the shop vacuum off and the part is just laying on the table to pick up.

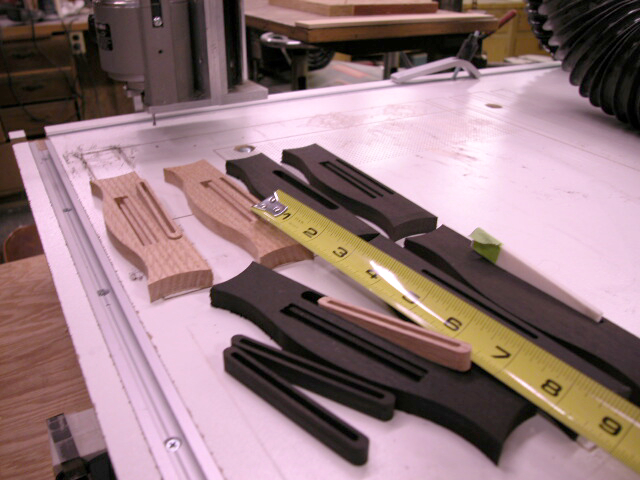
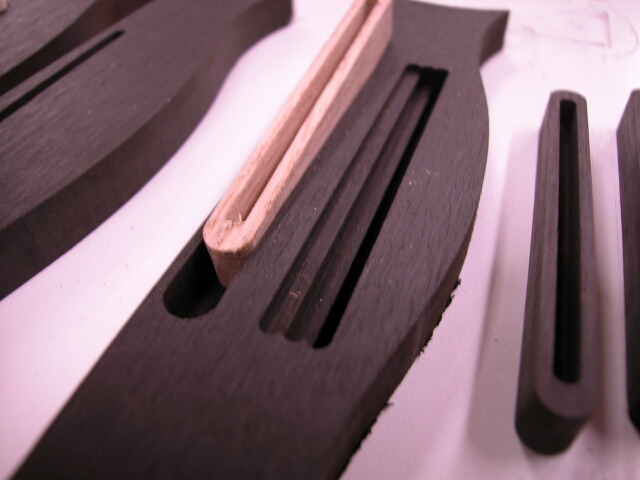
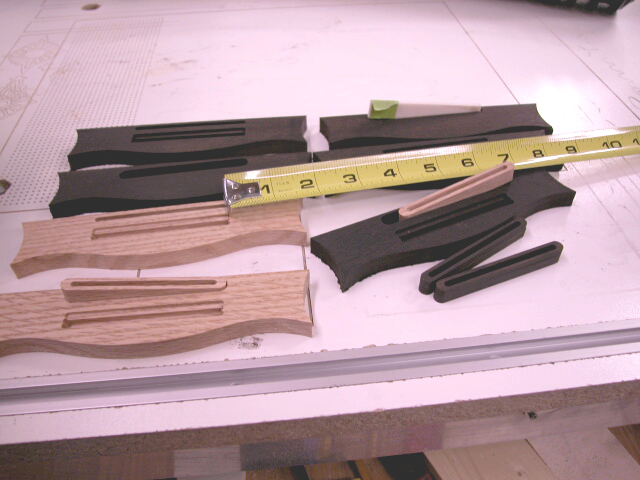
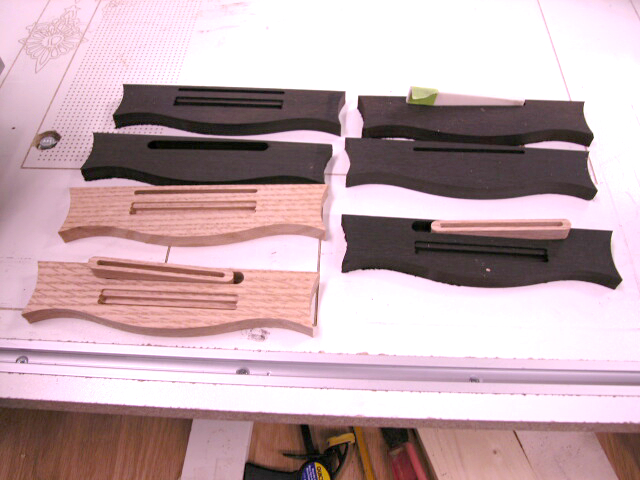
Guitar parts from 1/2 ebony using a 1/8" dia. bit. Feed rate of 15IPM cut in 2 passes for full depth.

First try at a sign, measures 3" X 9".
![]()
This engraving was to be used for the back of a bench
![]()
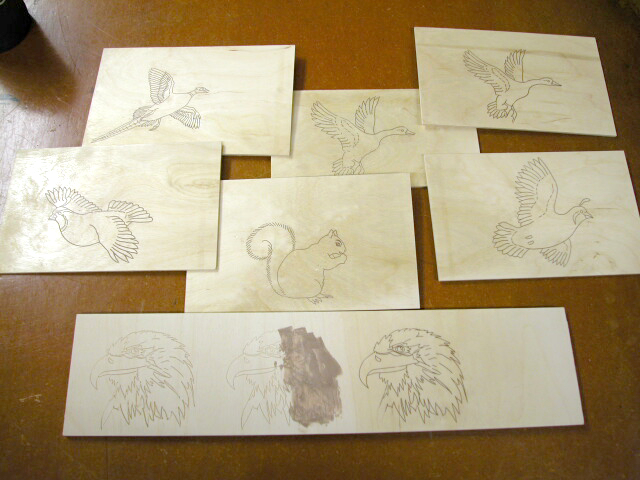
Some more engraving I tried out. The pheasant measures 4" X 7". the wolf is 4" X 4" and the eagle is 4" X 3 1/2"


I am giving some thought to supplying these type of engravings in Baltic Birch Plywood in a size of 4" X 4" to 4" X 6" panels, depending on the picture. They will come engraved but not filled. You can fill the engraved area with the color of wood puddy to match your project. The plywood can be stained before filling the engraving. Could be mounted in a frame after finishing, or you could use them as inserts for larger projects. My first though would be to cut the wood oval shaped, then rout out a pocket to inlay that oval into on your hardwood. At this time I have 16 wildlife pictures ready to engrave.

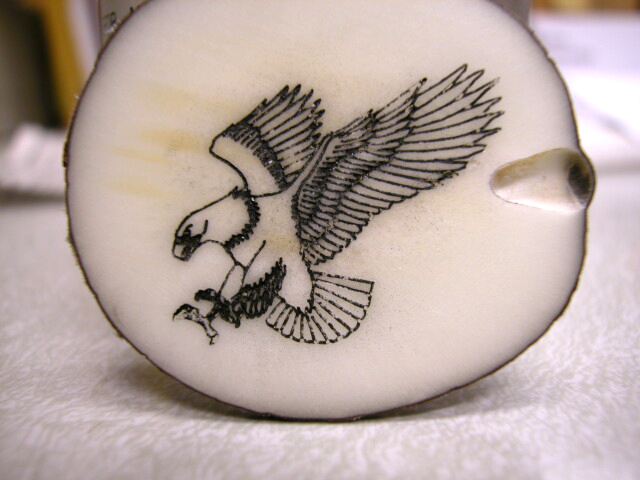
Tauga nut engraved with the CNC. The eagle measures about 1" X 1".
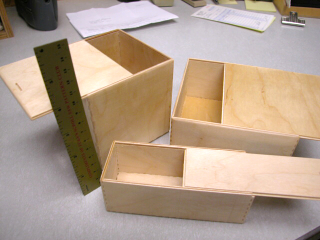
These are boxes that I have been making on the CNC. They are made from 1/8" BB Plywood and all of the finger joint and dados for the sliding lid have been cut right on the CNC.
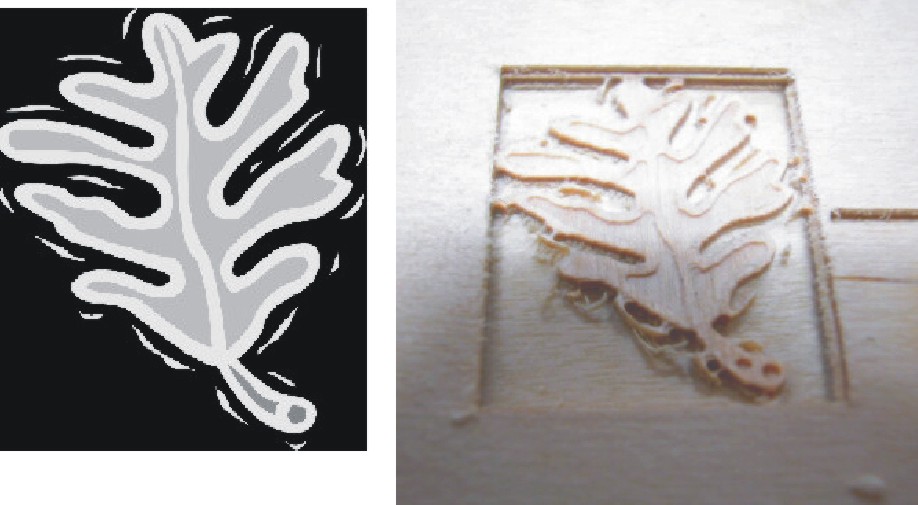 My
first attempt at 3D from clipart. The leaf is reworked clipart, then carved into
1/8" thick BB Plywood to about half depth. I have not cleaned up the fuzzy
chips, this is right off of the router.
My
first attempt at 3D from clipart. The leaf is reworked clipart, then carved into
1/8" thick BB Plywood to about half depth. I have not cleaned up the fuzzy
chips, this is right off of the router.
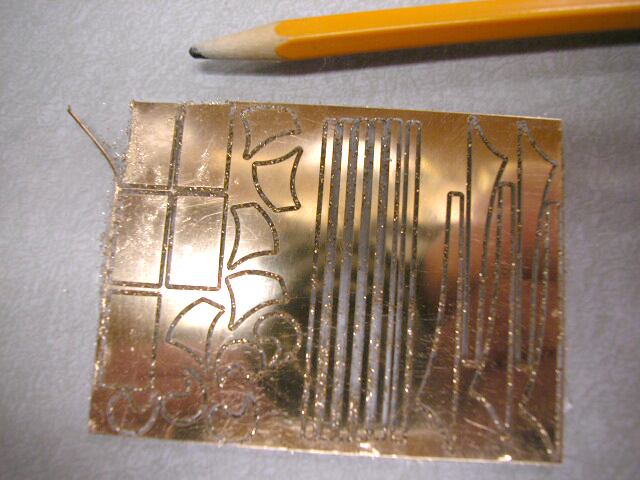
Cut some gold inlays with the router. The gold is 14K gold, .012 thick. This
was about a $150 piece of gold. It is
super glued to the plexiglass, then cut with a 1/32" bit. The original
piece measured about 2 1/4" X 3".