
I used 1/2" medex ( high density fiberboard ) for my jig. Cut a convenient size for your table top. Install a cleat on the bottom to slid in the table dado.


| Sanding Bevels | |
|
|
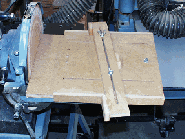
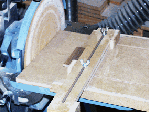
The bottom table slides across the face of the disc. The top table, that has the fence on it, slides along the bottom table and into the disc. |
|
Using this simple shop made jig assures that all of the sanded bevels or the same angle. And that the finished size of multiple pieces are all identical in size.
I used 1/2" medex ( high density fiberboard ) for my jig. Cut a convenient size for your table top. Install a cleat on the bottom to slid in the table dado. |
|
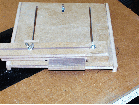
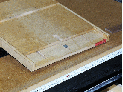
Then cut a second piece the same size as the table platform you just made. Install rails on the sides so this moving table slides in and out on the platform. Try for a snug fit so there is not any movement in the two as they slide. |
|
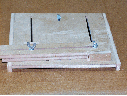
Cut 1/4" slots along the length of the sliding table as shown |
|
Slot the fence as shown also. |
|
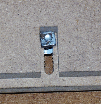
Dado for the heads of carriage bolts on the bottom. Notice the filed sides of the bolts to keep them from turning while adjusting the wingnuts on the top. |
|
Now the fence
is adjustable to any angle plus will slide forward or back. On one side of the
fence, end cleats can be attached as stops. The rail can have cleats in different areas.
Now the fence can be reversed to use the stops, to hold
the work in place. |
|
Then a short slot centered on the outer edge. This is a stop to control the distance the top table slides into the sander, allowing the table to be adjusted to slide closer to the disc when sanding bevels. I used a square nut on this bolt to make a bigger stop surface. Use the fence to set the adjustments for the wood. |
|
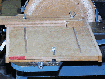
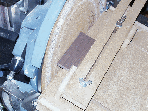
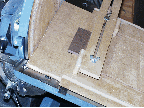
To use the jig, place the wood in the jig , pulled away from sander ,as shown. |
|
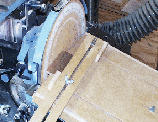
Slide the top table forward to the stop and adjust the fence. The stop is used to adjust so the top table comes close to the disc. |
|
The stop cleats on the fence are used to help hold the wood in place. |
|
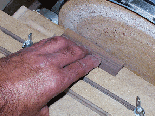
Slide jig into sander while holding wood in place with your hand as shown. The jig can also be slid from left to right as you feed into the sander , to keep the wood from burning during the sanding process. |
|
Once jig is fed completely into the stop you set earlier, the bevel is sanded correctly. Pull the jig back to the starting position and insert the next piece of wood. The next piece can be sanded and will be identical to the first |