Spraying Finish Techniques
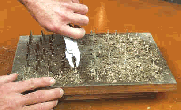
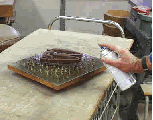
 The spray table is made from two pieces of plywood with a lazy susan bearing in between.
I used the brad
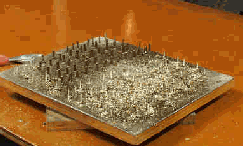
nailer, but any small diameter nails will do, to drive through the table. Is what you need is the nails to be spaced or random areas of nails , so that the work will be supported on the tips. The pattern of spacing is not important.
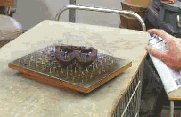
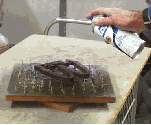
Place the work to be finished on the nail points face down. Spay the back of the piece from low angles. This low angle spaying is to finish the edges , even on the interior parts of the work. As you
spray one side, spin the table to the next side and spray, continuing until you have all of the edges sprayed from
this low angle angle.
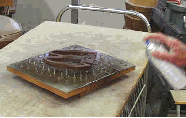
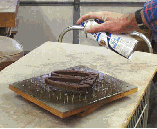
Then spray straight on.
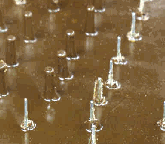
Flip the work over and let the back rest on the nail tips. The spots where the nails hit will not be noticeable, especially on the back of the work.
Now spray the front from the
same low angles from every direction as you rotate the work.
Once the edges are sprayed then spray straight on at the face to even out the finish. You will probably have parts of the face done with enough overspray from doing the edges, so don't overdo the finish in those areas. Just spray the areas needed to even the finish out on the face.
After prolong use you will get a buildup of finish on the nails. Using a pliers you can squeeze and slightly turning the finish buildup and it will break off leaving the nails on place.